Every MSP loses the most money in the first thirty days of a client relationship — not because the deal was bad, but because onboarding is where the cracks show. The contract gets signed, then someone has to actually stand the client up: create them in the ticketing system, get the right contacts in front of the right people, write the scope-of-work document, send a welcome packet, and explain to the client where they go to see what they're paying for. Most of that lives in someone's head, or in a checklist that's three versions out of date.
We built our onboarding flow because we kept doing the same eight steps in a slightly different order each time, and slightly differently per tech. Here's the workflow we settled on, and how the pieces of Morton Command Center support each step. The goal isn't to add a tool — it's to make onboarding the same every time, so nothing gets dropped between "signed" and "live."
Step 1: Create the company record
The first concrete thing onboarding produces is a company. In MortonCC, a company is the hub everything else hangs off of — its detail page has tabs for Overview, Work, Maintenance, Security, Backup, Billing, Invoices, Contacts, Licenses & Renewals, Email Preferences, Onboarding, and Settings. You don't fill all of that in on day one, but creating the record gives you a single place that fills itself in as the rest of your stack comes online.
This is worth being precise about: MortonCC doesn't replace your ticketing system or your RMM. It sits on top of the tools you already run through normalized adapters, and reads from / writes to whichever vendor owns each function. Those adapters are built to fit your exact stack — that's the headline advantage over rigid all-in-one suites that force you onto their pre-built connector list. The company record you create is the connective tissue — once we've built the integrations for your RMM (NinjaOne, Datto, or whatever you run), your PSA / ticketing system (Freshdesk, ConnectWise, HaloPSA — any PSA with an API), and your billing system, the per-company tabs light up with that vendor data within minutes of each sync. The platform is API-driven, so if your tool has an API, we build that integration for you, custom to your stack.
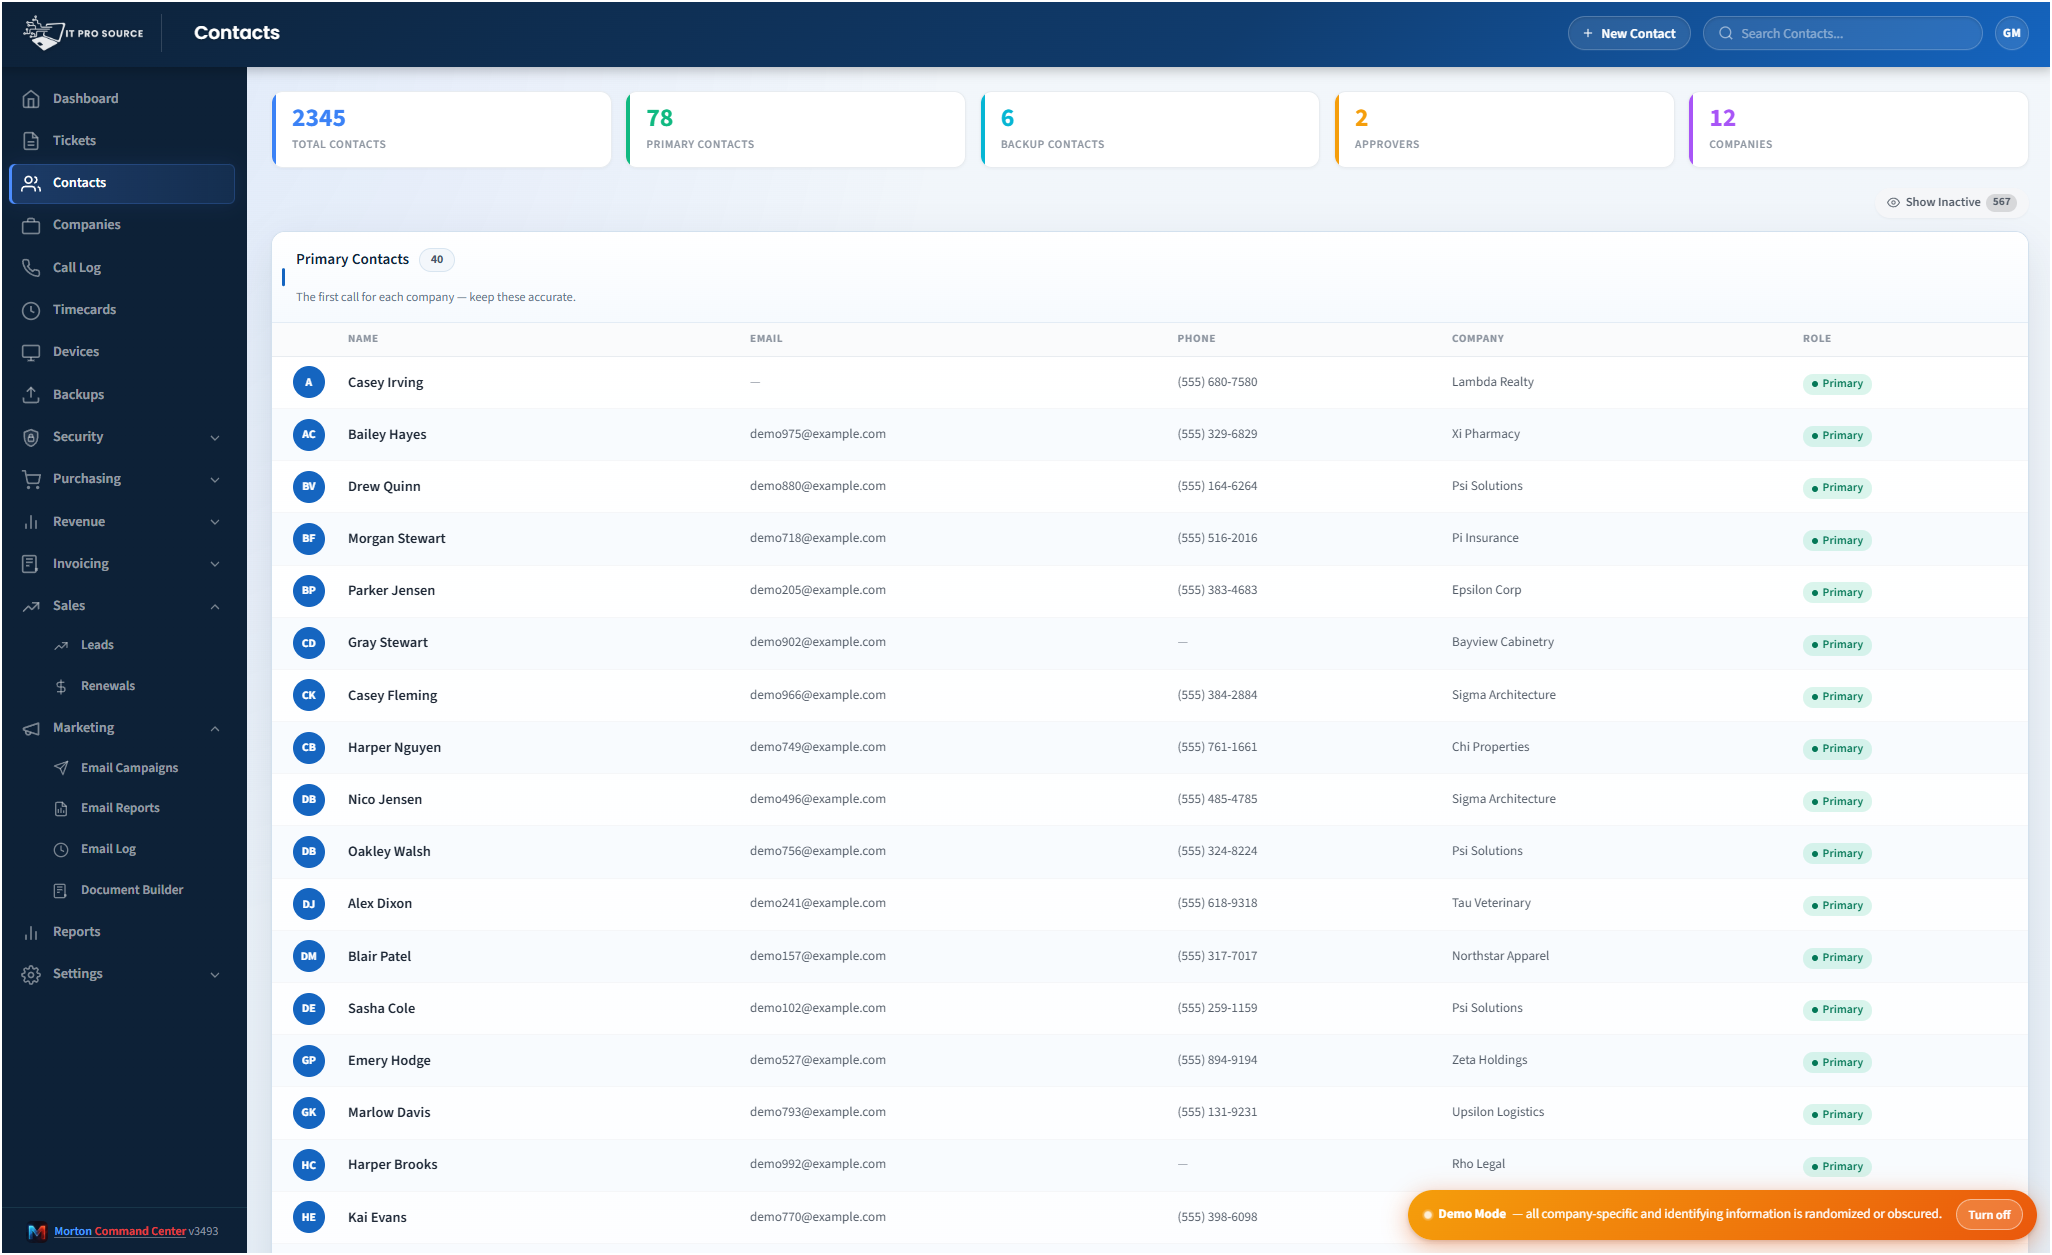
Step 2: Add the contacts — with roles
The contacts step is where a lot of onboarding quietly goes wrong. You add the person who signed the contract, and three weeks later a ticket comes in from someone you've never heard of asking to approve a hardware purchase. Were they allowed to? Nobody knows.
So we treat contact roles as a first-class part of onboarding. When you add contacts, you tag them — primary contact, backup contact, purchase approver — so the people fielding tickets and quotes later know who can sign off on what. Contacts live with whichever vendor owns your contacts capability (Freshdesk or MortonCC's native store), and you can create and edit them directly from the company page.
If the client runs Microsoft 365, you can pull their directory to build a contact-sync plan rather than retyping names off an email. One honest caveat: that sync writes the result into your contact vendor — it reads from M365, it doesn't write back into it. M365 stays the source of truth for the directory; MortonCC just saves you the typing.
Step 3: Write the SOW and the welcome doc
Once the company and contacts exist, the deliverables start: a statement of work that spells out what's in scope, and a welcome document that tells the client who their team is, how to reach support, and what to expect in week one.
The Document Builder is the piece that makes this repeatable. It's a branded PDF composer — you compose a document from a title, subtitle, sections, and a footer, on your own branding, and it saves to the platform so you can re-open and edit it next time instead of starting from a blank Word file. Export is to PDF. We keep a "new client SOW" and a "welcome packet" as our two standing templates and clone them per client, swapping in the scope and the team.
Be clear-eyed about what this is and isn't. The Document Builder is a structured composer working from a fixed template shape — title, subtitle, sections, footer — not a full drag-and-drop WYSIWYG layout designer. That's exactly what you want for onboarding paperwork, though: the constraint is the feature. Every SOW comes out looking the same, on brand, without a tech reinventing the layout each time. If you want the deeper tour of how that composer works, we wrote it up on the document builder page.
Step 4: Set up billing and the onboarding checklist
With the paperwork done, the back-office plumbing comes next: the billing config that drives invoicing, and the onboarding checklist itself. The checklist lives as a tab on the company page — it used to be its own sidebar item, and we moved it onto the company so onboarding state travels with the client instead of sitting in a separate to-do list nobody revisits.
The point of having the checklist attached to the company is accountability. Anyone who opens the client's record can see exactly how far onboarding has progressed and what's still open, instead of pinging the account manager. Billing config set up here is what later feeds invoicing — and because invoicing writes real invoices into your accounting system, getting the billing mapping right during onboarding is what makes the first month's invoice come out correct without a scramble. We build your accounting integration as part of your engagement: because the platform is API-driven, any accounting system with an API — QuickBooks, Xero, Sage, or whatever you run — gets built the same way, custom to your stack.
Step 5: Turn on the client portal
The last step is the one clients actually notice: giving them somewhere to log in. The customer portal is a white-label, customer-facing view that runs on its own per-tenant bundle and shows the client only their own company, strictly scoped. It carries your branding — your name, your logo, your colors — not ours.
You decide what the client sees. The portal sections are individually toggleable, so during onboarding you turn on what's relevant to this client and leave the rest off. The catalog of sections you can expose includes:
- Overview — a KPI strip, their plans and rates, and recent tickets.
- Work — included work and billable work.
- Maintenance — maintenance history.
- Security — EDR/MDR, identity/ITDR, and pen-testing cards, for the vendors you've enabled.
- Backup — on-prem and cloud backup status (monitoring and visibility — the portal reports status, it doesn't run or restore backups).
- Invoices — once we've built your accounting integration (any accounting tool with an API — QuickBooks, Xero, Sage — works the same way).
- Contacts and Licenses & Renewals — their contact roster and M365 license counts plus renewal dates.
For most new clients we start narrow — Overview, Work, and Invoices — and add sections as the relationship matures. Two things worth setting expectations on: the portal is a curated subset of the dashboard, not the full operator console, and the data behind it is near-real-time. It's cron-warmed on short cycles and refreshable, so a client checking their security card sees data that's current within minutes, not an instant live feed. The full breakdown of how the portal is scoped and branded is on the white-label client portal page.
Why a repeatable workflow beats a better checklist
The reason this matters isn't that any one step is hard. It's that onboarding is the moment a client forms their opinion of you, and inconsistency reads as disorganization. A SOW that looks different from the last one, a contact list with no roles, a portal that shows the wrong sections — each is small, and together they tell the client you're winging it.
Running every onboarding through the same path — company, contacts with roles, SOW and welcome doc from a saved template, billing and checklist on the company record, portal turned on with the right sections — means the thirtieth client gets the same clean experience as the first, regardless of which tech runs it. And because every piece reads from the tools you already pay for, you're not duplicating data into yet another system; you're giving it one front door.
And here's the part that sets this apart from a rigid all-in-one suite: every integration is built to fit your exact stack and workflows, not the other way around. Whatever your RMM, PSA, phone system, and accounting system are — NinjaOne, Freshdesk, 3CX, and QuickBooks, or Datto, ConnectWise, HaloPSA, RingCentral, Xero, Sage, anything else — we build the integration custom as part of your engagement, built for your build, not handed over from a stock connector list. Because the platform is API-driven, if your tool has an API, we support it — we build that integration for you, full stop. That's the power of custom over off-the-shelf: nothing forces you onto someone else's pre-wired catalog. Either way, onboarding stops being the part of the engagement you dread and becomes the part you can run on autopilot. For the bigger picture of why we built a platform that unifies your existing stack instead of replacing it, the custom MSP platform writeup covers the thinking.